Category: Uncategorized

Escape from Flatland – my Øredev talk

Last November, I gave two talks at Øredev in Malmö, Sweden. Unfortunately, it took 4 months to make it happen, but finally the video of my talk – Escape from Flatland – is available as an online recording.

I’ve poured a ton of stuff I learned about AR/VR/MR design into this 35 minute talk. It is full of how-tos, tips, traps to avoid, motivational examples and case studies for aspiring designers aiming to take their first step in the wonderful world of spatial computing. Here’s the talk’s abstract:

“When getting started with AR and VR development, the most difficult challenge to overcome is not technical — it is to think and design spatially instead of in 2D. Just like the characters in Edwin A. Abbott’s novella, most design teams find it difficult to escape traditional 2D thinking and seize the opportunities the new technologies present. This talk contains tips & tricks on how to think in 3D, alongside inspiring real-world examples and demos.”

Enjoy and let me know your thoughts in the comments!

EscapeFromFlatlandPoster

Thank you Hasko and Exa: The Infinite Instrument VR for allowing me to use a video clip and music in my talk!

HoloLens 2 – a Detailed Analysis

HoloLens 2 – a Detailed Analysis

On February 24, Microsoft has introduced HoloLens 2 to the world at the Mobile World Congress in Barcelona. And boy, what a launch it was! As with the launch of the first HoloLens four years earlier, this day will be remembered as one of the most important days in the history of computing – regardless whether Microsoft will be successful in their endeavors or not.

This analysis is not a quick first impression. It is based on 12+ hours of research and 3+ years of experience developing Mixed Reality (HoloLens, VR, and since last week, Magic Leap) applications, mostly for the enterprise (manufacturing, maintenance, repairs, health, aviation and so on). This post is loooong. And detailed. And I had to split it into two parts because I’ve got too much to say about the whole announcement apart from just examining the heck out of the device itself.

Note: I’ve not been lucky enough to see HoloLens 2 in person yet, so please be aware of that while reading. This post is based on:

And many others, including tons of tweets, conversations with fellow Mixed Reality enthusiasts, and even some answers to my continuously nagging questions from Microsoft. Having said that, any mistakes in this post are my fault alone. If you find one, please let me know!

Microsoft’s Goals

With Hololens 2, Microsoft is focusing exclusively on the enterprise, aiming this device squarely at first line workers and other enterprise scenarios. Alex Kipman has stated that with the next generation of HoloLens Microsoft has three focus areas: more immersion, more comfort, more value right out of the box. Let’s look at these in details.

More Immersion

An Increased Field of View

By far the number one complaint against HoloLens was the limited field of view. People have described looking at holograms as if you were seeing them through a mail slot. In practice, after showing HoloLens to hundreds of people, I found that most people could get used to the limited field of view after about 5 minutes. However, most demos don’t last 5 minutes, and this gave HoloLens a worse reputation than it deserved. I’m not saying that the field of view wasn’t a problem, but it wasn’t as much of a limiting factor as the media and most first-hand experiences made it out to be. Clever application design and taking advantage of spatial sound could mitigate most of the issues and made living with holograms not merely a bearable, but a useful and even pleasant experience.

A larger field of view is of course a very welcome change. And Microsoft has increased the diagonal field of view from 34 to 52 degrees. Most of the growth is vertical, meaning the picture is no longer 16:9, but has an aspect ratio of 3:2. This should take care of the “mail slot” comments. The pixel count and the viewable area has more than doubled. Luckily, the HoloLens ditched Intel’s processors (Mr. Kipman called this decision a “no-brainer” due to Intel’s shortcomings in the power efficiency area). HoloLens 2 will sport a decent Qualcomm Snapdragon 850, which should have no problem keeping up with the increased demands on the GPU.

New Display Technology

For the display, Microsoft has introduced a novel approach by combining two previously existing technologies: MEMS displays and waveguides. Waveguides have been used in the previous HoloLens, as well as with Magic Leap One, and a lot of other AR headsets. However, the images projected into the waveguides are now created by high precision laser beams – reflected form a set of mirrors vibrating at a crazy 54000 times a second. To design the entire optics system, Microsoft has used the vast computing capacity of its Azure cloud to simulate the path of the different colored laser beams through the waveguide almost at the photon level. And I can’t even fathom the incredibly intricate manufacturing process that’s needed for such precision.

Laser beams and mirror

The result is a picture that retains the high pixel density of the original HoloLens, while more than doubling the viewable area. It is also much brighter, capable of 500 nits, and judging from some of Microsoft’s materials, should be suitable for outdoor usage. (Bright sun causes the image of the current HoloLens to be completely washed out).

Microsoft is also ditching the 3-layer waveguide arrangement they used in HoloLens 1 (one for red, green and blue), and replacing it with a dual waveguide configuration (one for red and green, and one for green and blue). This should help with the color inconsistencies somewhat, but I’ll have to see what it means in practice.

HoloLens 3 waveguides

The unknown factor of this new optics system is of course the image quality. Waveguides are prone to have image quality issues, such as colorization. We have to see how much worse things get with the laser projection system. Most reviewers have not mentioned image quality at all (this is different from rendering quality, which is clearly better). This indicates to me that it is more or less in par with the first HoloLens or Magic Leap – any striking differences would have been talked about. However, image quality is much less important in an enterprise scenario.

But there’s another reason why a larger field of view is important for HoloLens 2. And that is the feature that pretty much stole the already super strong show: direct hand interaction.

Direct Hand Interaction

Since the first ever HoloLens demo, people wanted to touch the holograms, to interact with them the way they interact with real objects – with their hands. Push buttons, grab and move objects – or just poke them to see if they are real.

While it was possible to detect the hands of a user (as long as it was in one of two poses), direct interaction never caught up with HoloLens. The reason: the field of view was so limited, once you got close enough to touch a hologram, you could only see a very limited part of it. Because of the extreme clipping, most designers kept the holograms at the recommended 1.5 – 5 meter length (5-16 feet). This distance is of course, out of reach, so remote manipulation (using the head’s gaze as a cursor and the hand as the mouse button) was the preferred interaction model with HoloLens.

We got a taste of direct manipulation with Magic Leap (especially the Tónandi experience), which has a larger field of view than the original HoloLens. But most of the applications are still using the controller instead of direct manipulation.

hand tracking

But HoloLens 2 does not come with a controller, and when asked, Mr. Kipman has mostly evaded the question. So, direct hand manipulation is the number one way to get in touch with the holograms. You can poke them, resize them, rotate them, move them. You can press buttons, turn dials. You can even play a holographic piano, and as we saw in the incredibly fun and energetic demo of Julia Schwarz, the hand tracking is sensitive and precise enough to understand what cord you pressed! HoloLens 2’s hand tracking recognizes 25 points per hand, which is more than the 8 points per hand on the Magic Leap. HoloLens 2’s hand tracking also seems super robust based on the videos.

direct manipulation piano

This increased hand tracking quality is made possible by the new depth sensor that allows unprecedented precision and power efficiency. It has excellent short and long-range capabilities with super low noise that not only helps with hand tracking, but also can create a much better depth map of the environment and can even be used for semantic understanding of the device’s surroundings. (The new depth sensor is also being sold as a separate “Azure Kinect DK” device).

The Bentley demo Microsoft is showing off at the Mobile World Congress has blown away the mind of many who were lucky enough to try it. The demo involves two users, who can both pick and manipulate virtual objects, and see what the other user has in their hands. Hand tracking is so precise, that during the demo, participants are asked to give the objects to the other person and take their objects instead! All of this works naturally, without any strange gestures or commands to learn. Just as if you were exchanging real objects.

I’m super excited to see for myself how the direct hand interaction works. But from the demos and videos (and I watched a lot of them), it seems like Microsoft has got it right, and with a well-designed interface that follows real world objects (dare I say skeuomorphic?), interaction will be a breeze.

Instinctual Interaction

Of course, there are other interaction types on HoloLens 2. Voice commanding (which works offline), dictation (you’ll need an online connection for this), gaze (a pointer that follows your head), Bluetooth keyboard and mouse are all at the disposal of the designer. But so is eye tracking, which has been shown off to understand that you are approaching the bottom of a web page and will make it scroll up all by itself.

direct manipulation slider

Microsoft calls all these interaction types “Instinctual Interaction”, because you instinctively know how to use a button, turn a dial, grab and move an object, dictate, etc. I have a feeling this is just a re-branding of the term “NUI” (Natural User Interface), which is based on the same principles – bringing what you’ve learnt in the real world to human-computer interactions.

Eye Tracking

eye tracking cameras

Speaking of eye tracking, it is handled by two tiny cameras close to the nose, at the bottom of the glasses. It remains to be seen how precise and useful these are for interaction, but they also have two other purposes. They automatically calibrate the HoloLens according to your IPD (inter-pupillary distance) – this is key for proper depth sensing and reducing eye strain. The eye tracking cameras also work as a retina scanner to securely identify users the moment they put on the headset. If you’ve ever typed a password in a VR or AR headset, you’ll welcome the relief of instant login.

Microsoft has not implemented foveated rendering in Hololens 2. Foveated rendering in short is the technique that only creates high definition visuals around the point where you’re looking at – and keeps the visuals blurry outside the small area you’re focusing on, where your eyes are not sensitive to details anyway. Foveated rendering makes the job of the GPU easier while – in theory – keeping the perceived image quality the same. Technically, they could add this later as an upgrade. Eye tracking is available, and the Snapdragon 850 supports foveated rendering.

More Comfort

Microsoft’s aim with the new HoloLens is to make it a tool for first-line workers. Office jobs already give people a ton of computing power in the form of PCs, laptops, mice and keyboards. However, in the field, people need both of their hands to fix an airplane engine, install electricity or even perform surgery on a patient. They work in 3 dimensions, on 3 dimensional problems, instead of the 2D documents and tables. They need access to the right information, at the right time, and at the right point in space. And they need to use their devices throughout the day, even if just for short intervals at a time.

One of the most striking things when just looking at the new HoloLens vs the old is how the design of the headset has been changed. The heavy electronics has been split into two – with the computing part and the battery being moved to the back of the head. This puts the center of mass right above your spine instead of on your forehead, significantly reducing muscle strain in the neck. The headset has been also cushioned in a way that is super comfortable, and you can wear it for a prolonged time. All of these make HoloLens 2 feel significantly lighter and more comfortable than HoloLens 1 did, despite being only 13 grams (0.03 pounds) lighter. Hololens 2 components

Of course, all computers give out heat, and a state-of-the art AR headset is no different. However, judging from the heat dissipation mastery we’ve seen on HoloLens 1, and the extra cooling areas available for the unit at the back of the head, I don’t expect this to be a problem.

Speaking of the computing + battery unit: some people even call it a bun. That’s a fitting name which made me wonder how it would fare for users who have an actual bun at that point of their head. It will also negatively impact laying back on a high-back chair as the “bun” will not allow your head to lay on the headrest. Of course, this is more of an issue for the knowledge worker than the first line worker Microsoft is aiming the new headset at.

Fitting

Putting on HoloLens 2 is simple – just pull it over your head like you would with a baseball hat and tighten the dial at the back. I love Magic Leap’s solution for the same problem, but Microsoft’s approach is more practical and probably more solid when you are moving your head to look inside and around equipment or look up at a car on a lift. It also seems like HoloLens 2 is a one size fits all device, which is again a welcome feature for workplaces that have more users per HoloLens. However, you do have to calibrate the eye tracking for a new user, which takes about 30 seconds. Ah, and the big thing: unlike with Magic Leap, you can fit your actual prescription glasses under the HoloLens.

fit

Flip It Up!

Another striking new feature of the headset (again, super useful for first-line workers) is that the visor at the front can be flipped up. This allows unobstructed view of the environment as well as eye contact when talking to peers. HoloLens 1 also allowed the user to have eye contact with people around them, but it did require extra effort on the ones not wearing the HoloLens, much like a pair of (moderately dark) sunglasses would.flip

Customization

Microsoft is also launching the HoloLens Customization Program that allows partners to tweak the hardware itself to fit their environmental needs. The first such partner is Trimble, who have created a hard hat solution that only keeps the front and back parts of the HoloLens, and completely redesigns the rest – including the flip-up mechanism, the fitting mechanism and even the way the wires travel. TrimbleLensXR10_w_HoloLens2

Peripheral Vision

In a factory or construction environment, it is very important not to have your peripheral vision constrained. A thick frame around the glasses, such as Magic Leap’s have proven to be a showstopper for some of my clients just for this reason. You need to be able to see an approaching cart, you must see where you’re stepping – no matter how magical or useful the holographic world is, these safety rules are way more important.

With HoloLens 2, your vision of the real world is not constrained, especially with the flip-up feature. This may look like a small box to tick for Microsoft, but it shows their understanding of the target environment and commitment to truly bring a useful device to market.

Value Right Out of the Box

One of the big problems with HoloLens was that to get some actual value from it, companies had to hire expensive consultants and developers, and embark on a many-month journey just to get to a prototype. A prototype they usually couldn’t get actual value out of, apart from showing it at trade shows and creating cool PR videos. While creating dozens of such demos paid the bill and has been very educational for me personally, it was very rare that a company went beyond the prototype phase. Even a Pilot where they would be able to measure the ROI of a small, but actually working system rarely happened. This is not just my experience, it is what I’ve heard from other consultants in the space as well. The real success stories, with wide HoloLens deployments that generate value are rare. This is natural as the technology is so new, and a lot of the exploratory prototypes ended up with “This has great potential, but let’s get back to it in a few years, when the right device is available”.

For Microsoft, the problem with this was that they couldn’t sell devices and hasten the MR future they envisioned. Even the largest enterprises only bought a few HoloLenses, created a prototype or a demo for a trade show, but never put the – otherwise great – ideas into production, due to the shortcomings of the original HoloLens. There were some exceptions of course, but not enough to really move the needle.

Enter HoloLens 2, with a clear and ruthless focus on increased comfort and usability for first-line workers. Every decision Kipman and his team made designing HoloLens 2 screams “enterprise” – and it is an excellent strategy. But something was still missing. Why would an average enterprise buy a HoloLens 2 if they had to go and get vendors to develop applications that they can actually use? What good is an amazing head-worn computer without the software?

Microsoft has been talking to their customers and was watching what their partners were building. They have identified a few common applications and created turnkey solutions that aim to be killer apps.

“Remote Assist” that a worker can use to get help from his/her more experienced peer through a secure video call, and the ability to place drawings, arrows and even documents in the real world.

Remote Assist

“Guides” can help you learn how to perform tasks, such as fixing an engine through holographic instructions that guide you through the steps by understanding where the engine is, and pinpointing areas of interest.

Guides

And “Layout” to plan a space, such as a factory floor, a museum or an operating room in both VR and AR.

Layout

Microsoft hopes that these typical first party apps (I’ve created a few prototypes like these myself) will help answer the question of what the actual value of a HoloLens is. I still feel that the real killer app is missing, or maybe being secretly developed – but for the right customer, even these apps can justify the purchase of HoloLens, and are most certainly cheaper than hiring a team of professionals to develop them from scratch.

Summary

So, has Microsoft accomplished what they set out to do and created the perfect enterprise AR headset? I believe so. They are ticking all the boxes, and they are the right boxes at the current state of the industry. Other companies will no doubt follow, with more specialized, cheaper, lighter headsets that may be better for a specific task. But it is clear that when it comes to Mixed Reality and business use, Microsoft is ahead of the pack with a comfortable and very capable headset that has the ecosystem behind it.

Speaking of the ecosystem… Microsoft’s announcement wasn’t just about the enterprise. Mr. Kipman has stated multiple times that they are thinking hard about the consumer market. They need a more immersive display, better battery, a lighter, better design, and a $1000 price to get there. And he said that Microsoft is working towards that goal. And some of the – seemingly enterprise-oriented – services announced today have serious consumer implications. Azure Remote Rendering allows for a less powerful headset (see also: weight, comfort, battery), and Microsoft is gathering invaluable field experience here – starting now. Azure Spatial Anchors are the beginning of AR Cloud, and again – Microsoft is gathering invaluable field experience, and laying the groundwork there. Azure Kinect DK can be super useful for ambient computing, even in the homes (paired with microphones). I’ll talk about these in a future blog post – this one is already way too long.

Do you have a thought on the above? Clarification? Did I get something wrong? Let me know in the comments!

How to Achieve a 5-Wow HoloLens Demo – Preparation and Storytelling (Part 3 of many)

Preparing Your App

Demos are… different. You may have a fully functioning application that works well in its intended environment, with servers and cloud services and so on – but to actually demo it is a whole other story altogether.

The goals of a demo are different than the goals of a live application. A demo is all about making the user understand what your system is capable of. It’s about highlighting a carefully selected set of features instead of showing the whole, complicated system in its real environment.

too-much-work-not-enough-time[1].jpg

Since the goals of a demo are so unlike the goals of an application, the demo app should be different, too. If this sounds like a lot of work and almost like creating an entirely new application, you are on the right track. I’m not saying that you have to re-create everything from scratch – you can reuse assets, animations and parts of the architecture – but you do have some coding and thinking ahead of you. Let’s look at the peculiarities of a demo!

Users are unfamiliar with the problem domain

It is the nature of demos that the people you’re showing your application to often have zero idea about what the application does, or about the area or industry you’re app is solving problems in. So, you should simplify things and take time to explain the environment in your application is running in, and the kind of problems it is trying to solve.

Users are unfamiliar with HoloLens

Three years after its initial announcement in 2015, a lot of people have heard of HoloLens, and even seen some videos. But most people have not experienced it in real life and have no idea what to expect. So, you must help them putting on the headset, and practice basic interactions such as air-tapping.

Time is Limited

Whether we are talking about a demo at an expo, where people are lining up to experience your great thing, or in the meeting room where decision makers are (more or less) patiently waiting for their turn with the new shiny thing, 5 minutes is all a person gets in most cases. Ten minutes max if you’re lucky and talking to a high-level executive. Subtract the time needed to put on the headset, explain the scenario and basic interactions, and you’re down to just a few minutes of actual demo.

Users may give up

Sometimes people you’re demoing to will have had enough even before your carefully scripted story can conclude.

You have no idea what the user sees

I discussed this in the previous post – since HoloLens is a single user device, you most often have no idea what the user sees.

If you have ever given a 5-minute to talk, you know that it’s much more difficult to prepare for and perform, than it is with an hour-long speech. You must really focus on the gist of what you want to communicate. The same thing is true for a 5-minute demo. This is where a carefully scripted story becomes a must. I’ll talk about how to create such a script for maximum impact a bit later. For now, let’s look at the features your app should have to address the above issues.

Simplified Controls

You may have a super-efficient and fancy way of placing virtual objects in the environment, rotating them, moving them around, interacting with them, pressing buttons, and so on. You may use two handed tap-and-hold gestures to rotate and resize stuff. But since this is a demo situation, and a lot of your users will probably have not even seen a HoloLens before. You shouldn’t overwhelm them. Stick to the basics. Believe me, even a single air-tap can be daunting to first time HoloLens users. Two handed tap-and-hold-and-move-both-hands-in-a-coordinated-fashion gestures are almost guaranteed to fail for a HoloLens newbie.Fisher-Price-Toy-RC-Remote-Control-Thomas-The[1].jpg

If necessary, simplify your controls so that whatever you want to show in the demo can be shown using only basic air-tap gestures. You can still have optional features that require more sophisticated interaction techniques, such as air-tap and hold or air-tap and drag. But to accommodate those who are struggling with hand gestures, make sure the demo can be traveled through without these advanced gestures. Most people blame themselves and not the technology when they are struggling to use it. And you don’t want people to come away feeling inadequate after the demo. Make sure that you construct your app UX in a way that allows users to go experience the main points with just the clicker.

Special Voice Commands

I always find it very useful to build special voice commands into the application.

Restart Application is a command that is thoroughly tested to restart everything from scratch and prepare a new demo scenario. It resets everything that may have been moved, moves all state machines to their initial state, and so on. In fact, the whole demo app must be constructed in a way that even the architecture guarantees flawless restarting as much as possible. It is very unprofessional to have a demo that remembers parts of the previous session. You’ll have no idea what’s going on while the big shot CEO is wearing the headset. For high stakes demos, make sure you devote enough time to testing this restart mechanism thoroughly.

Reset Panels, Reset Layout or something similar if users can move stuff around and reorganize the virtual space. This allows you or them to quickly move everything back to its place without affecting the demo flow.

Demo Companion App on the Phone

You may even want to invest into a small helper app on a phone or tablet. This app will be running in parallel with the actual demo, but it is in your hand while the demo is proceeding. Looking at the app, you’ll be able to see the demo’s state, and also control it.
The Demo Companion App eliminates a lot of the issues I talked about earlier. Because it displays the state the demo is in, you don’t have to keep asking the user what he or she sees, whether the air-tap on the “continue” button was successful. If the user is struggling with the gestures, you can even send the Continue command to the demo app from your phone. Or trigger an event in the demo process. You can give the Restart App and similar commands and verify the results without asking the HoloLens user.

The Demo Companion App has its costs, too. Apart from the extra effort required for development, it requires a more complicated on-scene setup than a standalone demo running on the HoloLens itself.

The phone (tablet) running the Companion App and the HoloLens must be connected through Wifi or Bluetooth, and there are extra steps you must take when preparing the demo to verify that everything is set up properly.

I’d recommend using a Companion App at exhibitions or really high-stake demos. These scenarios can validate the extra effort that’s needed, and the Companion App can also result in one extra Wow for your 5-wow demo.

Storytelling

Storytelling is probably the most powerful tool to make people remember. Still, a lot of people giving demos completely overlook this aspect of the demo.

You don’t have to craft an elaborate Shakespearian story for your demo to be impactful. But it is super useful to build up a script of a demo, and use that as the guideline (dare I say: preliminary specification) throughout development; and it is often referred to during preparation and the demo itself.

When working on POCs (Proof of Concepts), I always start with a script. The user puts on the HoloLens and sees X. Clicks here, Y happens. Say a voice command, Z happens. And so on. This script is almost like what you’d do for a short video. In fact, a lot of the concept or demo videos I’ve worked on started from the same script as the demo app itself.

These scripts are designed around WOW-points. A WOW-point is where the person you’re demoing to will say “wow” or “that’s cool” or “nice” or something similar. I also try to make sure to have a grand finale, a big WOW-point at the end.

Let’s have a look at a concrete example – the first HoloLens app and video I worked on before I became an independent consultant. The app is called “HoloEngine” and you can download it from the Microsoft Store for HoloLens. I still love to give this demo as a first introduction to HoloLens, because it shows off almost all capabilities of the device.

Here’s how the HoloEngine demo goes:

1. Wearing the HoloLens, I start the app, which puts a holographic engine at about 2m in front of me. I make sure the volume is set to maximum.

2. I move the engine on top of a table, if one is around.

3. I take off the HoloLens, careful that I don’t cover the positional cameras so that they can keep tracking the environment.

4. I put the HoloLens on the head of the user. I make sure that he’s facing away from the engine while doing so, and is far enough to see the entire engine.

5. I ask the user to confirm that a blue dot and a small arrow is visible.

6. I ask them to turn their head in the direction of the arrow. I can also point at where I put the engine, and tell them to look there. I carefully examine their HoloLens from the side, and can see through the leaking light when they are actually looking at the engine.

Engine on table.gif

7. WOW Point #1: If a HoloLens newbie sees the engine, this will be their first wow experience. It may not look like much to our eyes, but if you remember your first hologram, you know why it’s such a big deal to see an artificial 3D object in the real environment. So, the first WOW is free!

8. I let them examine the engine for a few seconds, then I call their attention to the buttons below the engine. I tell them to move the blue dot (the cursor) on top of the Play button.

9. Either now, or before the demo I explain the air tap gesture, and ask them to perform it while keeping the blue dot on the Play button.

Engine Start.gif

10. WOW Point #2: The engine starts, and it emits an engine sound. Standing next to the user, I can hear when the air-tap was successful (if I didn’t forget to raise the volume at the start). The realization that the user has pressed a distant button with their hands, and that the engine started is enough to make them go wow.

11. WOW Point #3: I ask the user to turn around in place, and listen to where the engine’s sound is coming from. This introduces them to the spatial sound capabilities of the device, and makes them go wow again.

12. WOW Point #4: I ask them to put the cursor over the leftmost button, which (like other buttons) has a voice command attached to it. I ask them not to air-tap, but to read the hint (“Reverse Engine”) aloud, and the engine reverses it’s direction. The demo has been constructed so that voice command confirmation sounds are audible even for me, standing next to the user, so I’ll know when it was successful.

13. WOW Point #5: Lifting the right hand allows you to move the engine, and your left hand can resize and rotate the engine. Not everybody can perform the tap-and-hold-and-drag gesture for this, but by this time, I usually have a good understanding of the HoloLens-dexterity of the user. If he/she scores too low on this scale, or I’m low on time, I skip this step.

Engine walkaround.gif

14. WOW Point #6: I often need to tell people that they are not looking at a film, and can use their feet to walk around the hologram and look at it from all angles. This usually warrants another WOW.

15. WOW Point #7: while walking around the engine, the user will probably get close to it (if not, I ask them to). When they do, they’ll be able to actually look inside the engine, and see the pistons moving. This is the grand finale, where I can explain the whole point of the demo: that people are better at understanding complex 3 dimensional systems when they actually see it working in 3 dimensions instead of looking at books and perhaps videos.

engine look inside.gif

16. WOW Point #8 (post-credit scene): the last step of the demo arrives when the user clicks on the “i” info button, which takes them to a different scene, with 5 360world employees displayed as 3D holograms emitted from a floating spaceship-like thingy. I usually tell them that just displaying Credits – like at the end of a movie – sounded so last century, so we performed 3D scans of ourselves, and put ourselves into the app as holograms. For kicks, I may tell them about the Easter egg we put here that can be activated by saying “That’s creepy”. No, I won’t tell you what it is, you’ll have to download the app and find out.

holoengine about.gif

As you can see, for my storytelling, I didn’t invent a mythical “John” who wants to learn about engines, and explain things from their perspective. That could work, too, but the important part here is to have a step by step, well-practiced demo, built around WOW points. Out of the 8 WOW points, this demo usually gets around 5-7 wows per demo, depending on how relaxed and outspoken the person I demo to is. But this demo gets them to understand the capabilities of HoloLens (except for spatial mapping), and is enough to plant tons of ideas and start discussing how we can work together.

In the next post, I’ll discuss how you – and your HoloLens – can prepare for a demo. Let me know if you found this useful in the comments!

How to Achieve a 5-Wow HoloLens Demo – Displays, Projectors and Other Equipment (Part 2 of many)

Note: if the first paragraph seems familiar, it is not a coincidence. I accidentally published it along with the previous blog post at first. 

HoloLens is a single user device. This means that nobody can see what the user experiences. Not even you, which usually results in awkward questions like “Did you tap that? Did the button become active? What do you see?”. Not to mention the other guests at your booth or the other participants of the meeting who are suddenly either bored or – in the better case – flood you with questions that you can’t answer properly because you are trying to help the guy who is wearing HoloLens for the first time in his life (which is why you should bring a colleague to these meetings so that one of you can help with the demo while the other answers questions). 

Mixed Reality Capture

Using Mixed Reality Capture can help with some of these issues. It allows (you and others) to see what the user sees and thus you will have a much better idea of what’s going on in his head(set). If you connect your computer to a projector, it also allows other participants of the meeting to join in the demo. After all, nothing is funnier than the vice president of a Fortune 500 company placing holographic space helmets on his subordinate’s head. And joking aside, the demo will be more memorable if all participants in the meeting are involved.

But there are some drawbacks to projecting the user’s experience through Mixed Reality Capture, even if you do it right.

The first issue is that Mixed Reality Capture requires a more complicated setup. It needs a stable local Wi-Fi (especially difficult in an expo, where every booth has their own Wi-Fi hotspot) that you need to set up prior to the demo.

Also, running Mixed Reality Capture degrades the user’s experience – it lowers the frame rate to a maximum of 30, and can make the holograms choppy. It also reduces the resolution for the right eye. This quality degradation may not even be consciously recognized (especially if our “subject” has never experienced HoloLens before), but it does prevent him or her from experiencing your app in all its glory. So, even when I’m using MRC in a meeting, I usually allow for a minute of non-projection time and explain that the projection does decrease quality.

The third issue with projecting what the user sees is that it simply spoils the surprise for the others in the room, and reduces the number of WOWs you get.

So, you should carefully contemplate whether to use Mixed Reality Capture in a demo session – and whether to allow the participants to see it. The answer – as always – is that it depends, and you should decide on a case-by-case basis, considering the app, the audience, the technical environment and your goals of the demo.

In an expo scenario, I prefer to put a pre-produced video of the app on a large TV or a projector. This can attract visitors from further away from your booth, make them stop and take a brochure even if they can’t wait until the end of the line standing by for the demos. The pre-produced video can (and should) be professionally recorded and even include a third person view of the app using Spectator View, instead of a shaky first-person view.

Spectator View

Speaking of Spectator View, an expo or an on-stage conference demo can greatly benefit from an outside, third person view that shows both the user and the full virtual world around him/her. This is not an easy or cheap thing to do (requires a second HoloLens device, a powerful PC, stable communication between the different devices, a good camera and also some setup time), but if you can do it, it’s the best way to show what the user sees.

Spectator view.jpg
Spectator View used by Identity Mine at a conference. From https://www.youtube.com/watch?v=DgIHjxoPy_c

An even better solution is a moving spectator system, where the camera is in motion – but this is something that even Microsoft themselves can only afford at a few high visibility events, and requires a hefty equipment.

moving spectator view equipment.jpg
The moving spectator view equipment Microsoft uses at their demos.

Audio and Visual Clues

Audio is an important part of the HoloLens experience. But it can also help you understand where the user is in the demo flow. In a quiet environment, you can stand close to the user and hear the voice prompts, beeps, etc that you have added to the app, and you can know whether the air tap on the “next” button was successful or not. In my experience, high pitched beeps work best due to the sensitivity of the human ear and the sound frequency characteristics of the HoloLens speaker.

You can also learn a lot by looking at the HoloLens from the side. You won’t know what the user is looking at, but based on the small amount of light at the edge of the display, you can guess the overall brightness and color of the scene in from of them.


HL empty vs start menu.jpg
Looking at the HoloLens from the side, you can see whether there’s nothing in the users view (left) or when they can see the Start Menu (right)


Other Equipment

For a simple on-on-one demo, you may only need a charged HoloLens. If you want to use Mixed Reality Capture to see what the user is doing, you will also need a laptop, a Wi-Fi hotspot (unless you want to rely on the guest Wi-Fi, but setting that up on the spot can be tedious, and it may not even work or be available).

For longer demo sessions such as a whole day of demos at your booth, you’ll need your charger, a Wi-Fi hotspot, a laptop, a TV or projector and so on. You should also have more than one HoloLenses (both for backup and to serve more visitors) and keep them continuously on a charger when not in use. And if you’re using Spectator View or Mixed Reality Capture at your booth, don’t forget to bring all that equipment, too.

In the next post, I’ll discuss how you need to change your app to be suitable for a demo. Because to collect the maximum number of WOWs, you’ll have to. As always, please let me know your thoughts in the comments!

How to Achieve a 5-Wow HoloLens Demo (part 1 of many)

You have created an awesome HoloLens application. It really is great. Now it is time to show it off and make other people experience your incredible holographic powers. You take your HoloLens with the demo app installed to a conference, an expo, or to a meeting room. But how can you realize maximum impact for your demo? How can you get a 5-wow demo session (which means that the person you’re demoing to says “Wow” at least 5 times) consistently, (almost) every time?

5wows.jpg

This blog post series is about maximizing the wow-factor of your demos. I’m sharing the lessons learned during hundreds of one-on-one demo sessions. I’ll discuss demo environment, device preparation, unique app requirements for demo scenarios, storytelling and a one-two-punch approach to wowing your future customer or partner.

The Demo Environment

Let’s begin with the demo environment – where you will perform the demo itself. This can be a meeting room, an expo booth, a conference hallway, your own living room or even somebody’s kitchen.

Before discussing environment tips, let’s first think about how the environment affects HoloLens.

Space

The space requirements for your demo is highly dependent on the application you want to show off. In a typical one on one demo scenario, you can sometimes get by with as much space as you need for 2 people to stand next to each other. But mixed reality mixes reality and the virtual world, so sometimes you need more space. For example, if you want to augment a car, you will need enough space to fit the car, and allow for you and your guest to step back and look at the car from a few meters distance. Meeting rooms are often laid out so that there’s a huge table in the middle, which doesn’t leave much space for people to move around. So, if you’re not in control of the environment where the demo will take place, you may want to request some additional time to move some furniture.  Just let the meeting organizer know that you will need some time to set things up before the meeting.

Lighting

Lighting is important. In low light, the holograms pop out more, look brighter, more solid, more colorful and have more contrast. However, if there’s not enough light, HoloLens may lose its tracking, which relies heavily on the 4 positional cameras on the device. Fortunately for this to happen, the room has to be almost pitch dark, certainly dark enough for people to feel uncomfortable.

On the other hand, too much light can also cause problems. There’s only so much light HoloLens’ displays can add to the environment – and broad daylight can wash out the display to the point of your app being totally invisible. This is one of the reasons why Microsoft doesn’t recommend using HoloLens outdoors.

So, as far as lighting goes, I had the most success with dimly lit rooms – kind of your “romantic mood lighting”. But HoloLens works well even in a fairly well-lit expo hall, too. Just avoid direct sunlight and spotlight if possible.

Walls and Furniture

Let’s discuss walls and furniture next. Again, there are two important things the visible environment influences: tracking quality and the visual experience.

Since HoloLens relies on visual tracking, pure, solid color walls all around can cause it to lose tracking. If you haven’t seen this in action, just stand in a corner of any room with pure white walls. HoloLens will not be able to identify feature points, and tracking will be gone until you step back a little.

Now, just one solid colored wall is usually OK, because HoloLens has two cameras that look left and right, and these are enough (most of the time) because they are also used by the tracking algorithm. Just avoid stepping too close to a solid colored wall. A more textured wall, such as one with tiles, or a poster, or a booth wall with text and graphics will have none of these issues.

As for wall colors, medium and darker colors work best – again because the holograms will pop out better when they are in front of a darker background.

So, if I’m working with companies bringing their HoloLens apps to an exhibition where they control the design of their own booth, I recommend a patterned, not too bright set. Wood furniture also works great, especially if you have a hologram to put on a real table in your app.

If the demo environment is controlled, you may even have the chance to use part of the environment as a set. This rarely happens outside of an expo booth or your own meeting room, but it can help the demo tremendously. For example, while working with 360world, I worked on a booth demo for the World ATM Congress, which showcased HoloTower – an app that air traffic controllers use in the tower. This demo was specifically designed to work with a two-piece set that acted as the “windows” of the imaginary tower, and we had a full holographic airport with moving airplanes right outside these windows.

Madrid demo set small.jpg
The set mimics a fogged in air traffic control tower, but with HoloLens, visitors can see the airport and the planes outside the “window”

Noise

If your app has sound, uses voice commands or speech recognition, you have to take noise into account. Of course, you’ve already considered this when you were designing your app, right? But you may have designed your app for a quiet home or office setting and then you get to demo it in a noisy expo booth of conference hallway with a ton of background chatter.

Unfortunately, the speakers of the HoloLens are pretty weak. The poor man’s, on-the-spot solution to this (after you’ve checked that volume is all the way up and no Bluetooth audio devices are connected) is to ask the user to form a small cup over his/her ears and the speaker.

The much more professional solution is to have an external speaker and attach it to the HoloLens. This can be a Bluetooth speaker or one with a standard headphone jack. Just please don’t use in-ear headphones (earbuds) as those are not too hygienic, especially after being used by dozens of people throughout the day. The advantage of separate headphones is better sound quality (especially when it comes to the lower frequencies) and better separation of background noise. But don’t use noise canceling headphones. HoloLens’ speaker design is augmented sound, meaning the user gets to hear both the real world and the app’s sound – just like she can see both the real and the virtual world. Depending on your app, this augmented sound feature can be important – but even if it’s not, if your headphones discard external noise, that means that the user won’t be able to hear you either while you’re walking her through the experience.

The other issue with noise has to do with speech. HoloLens has a pretty good and well-tuned microphone array, but it can’t do too much to isolate your voice if there are people standing next to you, trying to shout over the general background babble that’s trying to shout over the music coming from the booth next door exhibiting their line of car speakers. Because often this cannot be avoided, and speech recognition issues often lead to jovial ridicule, you should have alternatives built into your app. One alternative is that voice commands should also have a “click” equivalent, such as a button the user can air-tap on to go to perform an action. The other, more sneaky alternative is to have a separate app on your phone, which you activate when the HoloLens demo is running and “fake” that the app heard what the user said by pressing buttons on this app. This solution needs more preparation and better control of the environment, but it can work well, and this demo companion app is something you may want to have anyway (I’ll return to it later).


And that’s it for the fist post in this series. Next, I’ll talk about how to help others (who are not an active participant in the demo) understand what’s going on – including you. Let me know your thoughts in the comments!

András has been a Microsoft MVP Awardee for 10 years now, a Pluralsight author, speaker and consultant on AR/VR/MR technologies, from HoloLens to ARKit.

Demoing HoloLens – Help Users Adjust Their Headset Properly

It can be fairly challenging to put on HoloLens properly for the first time. And a headset that is not properly adjusted can result in blurry or not full field of view.

This was often an issue when I was showing off our HoloLens creations. Sometimes the headset is just not put on correctly, and the user will lose half of the field of view, and often the whole point of the demonstration is lost. Of course, as the demonstrator – the person not wearing the HoloLens – I didn’t see what the user saw or didn’t saw, so we ended up with an awkward conversation.

“Can you see the little blue dot in the middle?” or “Is the edge of the holograms’ display area sharp or blurry?” or “are you sure you’re not seeing about *this* much of the Hologram?”

To help with this issue, the HoloLens calibration tool has a first step that asks you to adjust the device on your head until you see all edges. But that doesn’t help us when we have to demonstrate our own app, does it?

HoloLens calibration experience

So, after doing hundreds of in-person HoloLens demos, I decided it’d be nice to copy this functionality for our own apps. And thus, the HeadsetAdjustment scene has been born. It is currently a PR to the HoloToolkit, but hopefully it’ll be merged soon, making it my second HT contribution.

The Experience

The User will se a similar invitation to adjust the headset so that all edges are visible. He can then proceed to the actual experience by air tapping or saying “I’m ready”. Simple!

20170327_134009_HoloLens_1_2.gif

The Developer’s Side

First, a huge thanks to @thebanjomatic for his tips on finetuning the scene!

The headset adjustment feature is implemented as a separate scene, and can be found as HoloToolkit/Utilities/Scenes/HeadsetAdjustment.unity. The simplest usage scenario is when you don’t want to modify anything, just use it as is. For this, all you have to do is add the HeadsetAdjustment scene as your first scene, and your “real app” as the second. The HeadsetAdjustment scene will automatically proceed to the next scene when the user airtaps or says the “I’m ready” phrase.

HeadsetAdjustment_build.PNG

Of course, you can customize the experience to your liking. To change the text that’s displayed, you can edit the UITextPrefab properties here:

properties.PNG

By default, the next scene is selected automatically based on the scenes included in the “Scenes in Build” window of Unity. In the above example, the HeadsetAdjustment scene is #0 (meaning it is loaded and started first), and the actual app loaded after the adjustment is the GazeRulerTest – the #1 scene.

However, you may want to override this. The HeadsetAdjustment script allows you to specify the next scene by name in the NextSceneName property. If you enter anything here, it’ll override the default behavior of finding the next scene by number, and it’ll load the scene with the name provided in this field.

You can also customize the voice command the user can use to proceed in the Speech Input Source.

Happy demoing!

Now you have a way to ensure that the person you’re demoing your latest creation to has the best possible experience. Enjoy!


HoloLens Mixed Reality Streaming Done Right

Most people will have a huge smiley on their face when you show the HoloLens to them. With way over a hundred demos behind me, only 3 or 4 didn’t agree right away, that mixed reality is the future.

joy
My friend is experiencing the HoloLens for the first time, with a huge smile on his face

So, demonstrating HoloLens is a very grateful job. But it can be pretty frustrating, too, because:

  • You can’t see what the user sees, and can’t offer help or explanations;
  • If there are more people in the room, they’ll be bored as they have no idea what the current lucky person is experiencing.

Luckily, Microsoft has added a way to wirelessly project the so-called Mixed Reality view from the HoloLens. This displays the GPU-generated holograms that the user sees over the video coming from the RGB camera, and streams it real-time to a computer.

hololens tracking
Example of a mixed reality capture – the furniture is real, while the game character and the coins are not.

The problem is, that to get this streaming right, you need to have a lot of things working together. Most of all, you need a fast and reliable Wi-Fi connection. But even then, there is usually a delay measurable in seconds, often as much as 5-6 seconds. This makes it extremely difficult to explain what you’re seeing on stage (because you have to explain what you saw 5 seconds ago, which what the audience sees right now). And when you’re trying to help somebody, it can be downright frustrating, because you say stuff like “yes, there is is… oh wait, there it was 6 seconds ago, move back… not there… the other one… now air-tap… let’s wait a little until I can see that you successfully airtapped…”. In a business scenario this even comes along as unprofessional, and can make the HoloLens look like it’s not ready yet.

To illustrate the delay, I put on the HoloLens, and launched the Mixed Reality Capture Live Preview in the HoloLens Device Portal. Then I opened up and closed the Start Menu. Conditions were fairly good, so I “only” experienced a 4 second delay:

4 sec delay.gif
The ~4 second streaming delay. This is far from ideal for presentations or helping others.

After months of experimenting, and dozens of demonstrations, we at 360world found a way to reduce the latency significantly. This has worked for us a dozen times already, under varying circumstances, including our own office, a client’s office and even in very busy conference locations. And the even better news is that it is easy to implement.

Step 1 – Use Windows 10 Anniversary Edition

You should use Windows 10 Anniversary Edition on the computer you want to stream the Mixed Reality Capture to. (you can just use this computer or a projector to share the results with a larger audience). The reason is that for Step 3, you need a new AE feature.

Step 2 – Enable Mobile Hotspot on the Computer

This is a new feature in the Windows 10 Anniversary Edition. You can access it from Settings / Network & Internet, and Mobile Hotspot:

SharedImage.png
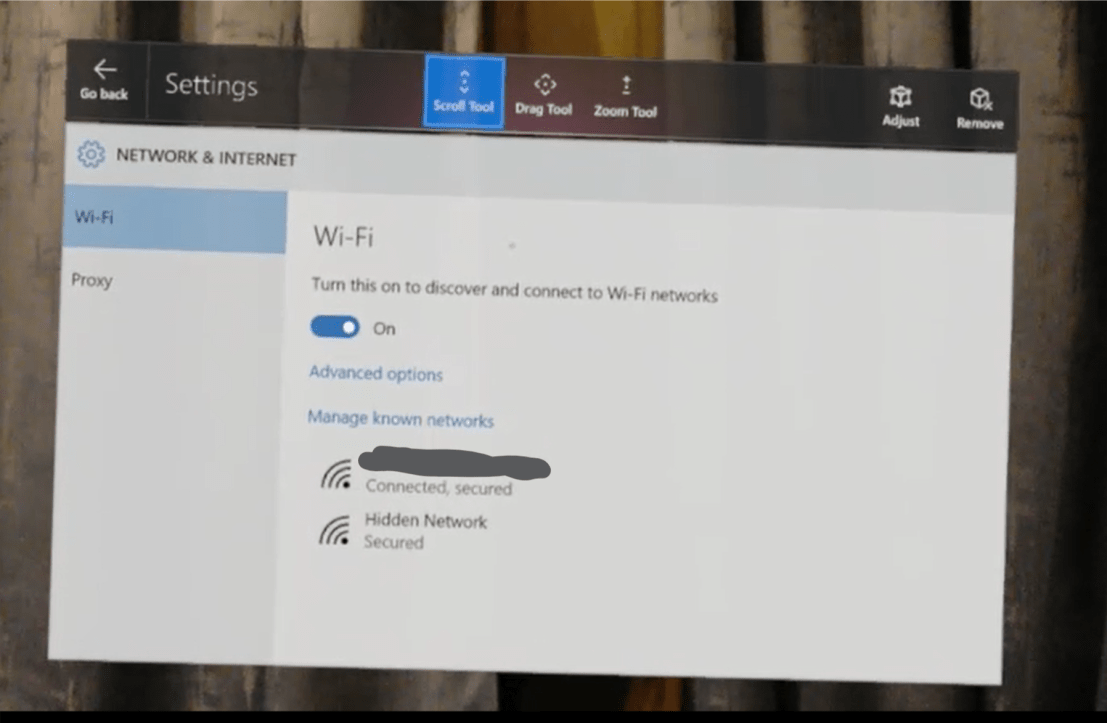
As you can see, the computer has to be connected to the Internet (and has to have a Wi-Fi adapter) for the Mobile hotspot to be enabled. If you can’t see the above warning, all is OK – turn on the “Share my Internet connection with other devices” checkbox.

Step 3 – Connect the HoloLens to the Mobile Hotspot on your Computer

And here comes the trick: once the hotspot is set up, you need to connect your HoloLens directly to the hotspot:

SharedImage 3.png
The HoloLens is connected to the mobile hotspot on the computer

Now air-tap on the Advanced options link, and take a note of the IP address of the HoloLens. You will need it soon.

Step 4 – the HoloLens Windows App

For the best streaming results, forget the device portal. What you need is the Microsoft HoloLens app from the Windows Store. This app has most (but not all) of the features of the Device Portal, and seems to perform much better when it comes to live streaming the Mixed Reality Capture.

Once you have the app installed, click on the + button, and add your HoloLens to the form. This is where you need the IP address of the HoloLens you – hopefully – recorded earlier:


SharedImage 4.png
The Add your HoloLens screen of the HoloLens UWP app


You should now see the HoloLens you just added, and hopefully it is online. If not, make sure that the HoloLens is still turned on. You may need to wait  few seconds before the HoloLens app can detect the device.


SharedImage 5.png
Select the HoloLens you want to connect to.

Click on the connected HoloLens, and

Step 5 – Enjoy!

Click on the first icon called “Live Stream”, and Live Stream should start. To further reduce latency (and not to cause audio issues), you may want to turn off the audio in the … menu.

Here is the result:


much better.gif
Much better!

As you can see, the latency is well below 1s, in fact, about 0.5s! This is more than satisfactory for any kind of live demo, or helping a first-time HoloLens user.

In fact, depending on how noisy the airwaves around you are, you can even switch it to High Quality mode from the default “Balanced” setting.

This solution is still not foolproof. The connection is wireless, and packet losses occur that can add more and more delays to the stream. If this happens, just navigate away from the live stream and quickly come back, and you’re good as new.

nexus2cee_50190-have-you-tried-turning-it-off-hfqe_thumb

To sum up:

  1. Use Windows 10 Anniversary Edition
  2. Turn on Mobile Hotspot
  3. Connect your HoloLens to the Mobile Hotspot on your computer and make sure you know the IP address
  4. Install the Microsoft HoloLens app on your computer, and connect it to your HoloLens
  5. Use “Live Stream” and tune it as you like.


Enjoy demoing HoloLens!


New Year, New Blog!

New Year, New Blog!

Well, it is not exactly a new year just yet, but we are pretty close. A lot has happened to me and a lot has changed around in my professional career during this last year or so, and as a result, I am taking up blogging again.

One of the big changes is in my MVP Status: I am proud to say that I am now part of the Emerging Experiences MVP group, focusing on what Microsoft calls More Personal Computing: Cortana, inking, gesture driven computing (Kinect), Microsoft Band, Windows Hello and of course, Holographic Computing with HoloLens. The Emerging Experiences group is part of the larger Windows Developer MVP group, which is awesome, since I have and will be doing a lot of things in this area, too.

One of the biggest projects I am finishing up is my course on Pluralsight, called “Introduction to Universal Windows Platform Development with XAML”. I’ve put a lot of work into this course, and I am very proud of the result.

What About the Old Blog?

I have to leave my old place at http://vbandi.dotneteers.net – that blog runs on a very outdated blog engine and my own server, and I just can’t keep maintaining it. I’ll do my best to at least reserve the old posts somehow – I still get a decent amount of traffic, and sometimes my own searches take me back to that old site. But new posts will happen here.

And what will be Here?

I’ve always been fascinated by how computing can be made available for an ever growing audience – about new human-computer interaction paradigms, user experience. I thoroughly enjoy living in the sci-fi world of my childhood – there’s so much stuff possible today that has only been a dream 20 years ago. And what’s even better, I get to be a small part of bringing this future to life, making it happen. Being a software developer is the closest you can be today to being a real life wizard. Making thoughts materialize, turning ideas into joyful moments for millions, making people more productive or even changing or saving lives – it’s all possible through software. It is a difficult profession though – sometimes even creating something small can take months of hard work, and not just whispering a few magic words or waving a wand. But this is the kind of magic that works!

I don’t have a planned set of topics. I’ll go where my professional career and my passion towards the magic of technology – takes me. Right now, it is my UWP course on Pluralsight, my fascination with HoloLens and other emerging experiences. It may be something entirely different a few months from now. The only way to find out is to begin and walk the walk. I’d be happy to have you along the ride!